Background

8/31/12

NOFA-NY Locavore Challenge- Join me!

I am not doing my regularly scheduled "This Moment" post today.  Mainly because I was too lazy to put this post up on Wednesday like originally planned but I just spent a few days researching/buying a new TV because Bug decided to wash the old (and perfectly working) TV.  She threw a freaking whole cup of water at time.  The joys of parenting!

Sure she's cute but watch out she'll destroy electronics!
I love eating real food.  It makes me feel good, helps me keep some of the more serious complications of the PCOS at bay and it is just plain delicious!  I really cannot eat processed foods anymore without either tasting all the crap in it or getting sick. It has taken me a while to do this. On vacation I had one of those fake cheese and cracker packs and I took one bite and that was it, yuck!

We have been slacking in the meal planning department a bit in our house this summer.  I was looking through our bank statements and I saw just exactly how much we were eating out for dinner, which was way more than we were eating at home.  Uh-oh!  Don't judge, life happens!

Then I realized September is right around the corner.  This means that the NOFA-NY Locavore challenge will be here.  What a great way to get back into eating healthy again!


If you do not know what the NOFA-NY Locavore Challenge is let me enlighten you!  The Locavore Challenge is simply 30 days of eating local, organic and sustainably grown food.  You can challenge yourself to a day, week or the entire month.  They also host events throughout New York State, ending with a statewide potluck on September 30th.


We are planning on doing the entire month.  So I thought what a perfect time to also challenge ourselves to a month of no take out!  The Hubs even said he would try to go a whole month without soda!  I was floored! 

So for the month of September I will share with you visits to farms, tips on how to take baby steps to get rid of the processed foods and replace them with real foods, real food recipes, and our trials and errors!  It is going to be a great time!  I cannot wait to share with you our trip to the beef farm!    

So I hope you will join me?  Do you think you can eat real food for a day, a week, or a whole month!  And you don't have to live in New York to challenge yourself, I won't tell.  I would love to turn this into a little virtual challenge/party and share some real food recipes!  Maybe have a little picture potluck on the 30th?  Sound fun?  

If you are interested in joining me leave a comment below or drop me a line at raisingsweetgraceATgmailDOTcom and let me know!  

8/24/12

This Moment


{this moment} - A Friday ritual. A single photo - no words - capturing a moment. A simple, special, extraordinary moment. A moment I want to pause, savor and remember.


If you're inspired to do the same, leave a link to your 'moment' in the comments for all to find and see. Via soulemama.


8/22/12

Ahhh vacation!

Who doesn't love vacation?  I could spend my life on the beach.  There was nothing like the smell of the ocean and listening to the waves crash on the shore.  We even got to see some dolphins swimming around.  I took pictures of everything!!

The kids spent a whole week in Wildwood, NJ, the Hubs and I came down and joined them later that same week.  It was nice that the Hubs and I got a little alone time.  We tend to put ourselves last for just about everything and it was nice to just focus on one another.

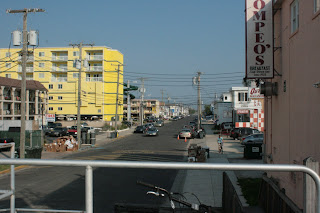
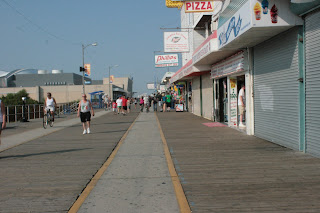
Anywhoo!!  We went on a bike ride on Friday morning and I gave Little Bird the camera.  She took some awesome pictures of the boardwalk.  Bug had my cousins camera so she was happy.  I love Bird's perspective, take a look!!


Pretty good for a six year old, right?

8/10/12

This Moment


{this moment} - A Friday ritual. A single photo - no words - capturing a moment. A simple, special, extraordinary moment. A moment I want to pause, savor and remember.


If you're inspired to do the same, leave a link to your 'moment' in the comments for all to find and see. Via soulemama.


8/9/12

Sunbathing and Homemade Sunscreen

I am going to start this post with a disclaimer: Please use common sense when taking my advice, not that I would intentionally put you in harms way.  That being said, I am not a doctor, I just do what I think is best for my family.   

Now that I got that out of the way!

There is so much controversy about the amount of time we should spend in the sun, should we use sun block, should we not.  But did you know that you can get your daily dose of Vitamin D from 15 minutes of unprotected sun exposure and it can decrease your risk for certain cancers including breast cancer and colon cancer?

Somewhere in Florida
Personally, we do not use sunblock unless we are going to be out in direct sun all day long or during peak sun hours (even then I am reluctant to use it).  In my opinion sunbathing, in conjunction with a healthy diet, is extremely good for you.  I also think the risks of the sun out weigh the risks of sun block.  Commercial sunblocks contain tons of chemicals and research shows sunblocks are often the cause of cancer.  It is scary to think that we are constantly being told to slather this stuff all over ourselves for the sake of preventing cancer.

Little Bird at the beach a few years ago

With organic and natural products being so expensive (I have seen some sunscreen that were upwards of $20, ouch!)  I started researching how to make homemade lotions, soaps, tooth paste, etc.  I know exactly what is in them and I feel comfortable with my family using them.  I am absolutely in love my homemade lotion.  I gave some to my neighbor and babysitter this past time and they loved it too!!  So I thought why not sunscreen?  You can use this on your face, just avoid the eye area.  Since it contains absolutely no chemicals, it is safe to use on the whole family.

HOMEMADE SUNSCREEN-About an SPF 30

1/2 cup beeswax
1/2 cup coconut oil
2 tsp of Shea Butter
1 cup almond oil
2 tsp Vitamin E oil
4 Tbsp powder Zinc Oxide (Be sure not to inhale)
Essential oil (EO)- (Do not use citrus oils as they can cause an unpleasant reaction when exposed to the sun causing it to lose it's effectiveness)

Start by putting water in a double boiler, if you do not have a double boiler use a glass bowl in a pot or I have seen people use mason jars.  I prefer the glass bowl, it's easier to clean.  (Side note: do not use any bowls or utensils that you plan on eating out of at a later time.)  Add everything except the zinc and EO and melt.  I like to add the bees wax first, then the coconut oil, then the shea butter, vitamin e and almond oil.  Once melted take off the heat and mix in the zinc and EO.  Pour into a small mason jar or muffin paper and enjoy!  It is a thick lotion and cannot be put into bottles but it will melt if the temperature goes over 75 degrees so store it in a cool dry place like the fridge!  If you want a higher SPF just add more zinc.  THIS IS NOT WATERPROOF, YOU WILL HAVE TO REAPPLY IF YOU SPEND TIME IN THE WATER!

The sunscreen will be good for about 6 months.

Sorry for the dark picture, there is not a lot of light in my kitchen at 10:30 at night!


Are you inspired to start making non toxic versions of your favorite products?  It is incredibly easy to do!  Let me know what products you have started making below!

8/3/12

This Moment


{this moment} - A Friday ritual. A single photo - no words - capturing a moment from the week. A simple, special, extraordinary moment. A moment I want to pause, savor and remember.


If you're inspired to do the same, leave a link to your 'moment' in the comments for all to find and see. Via soulemama.


8/1/12

Homemade Lotion Bars

We have been testing and testing different homemade beauty products.  I just love these homemade lotion bars.  One application in the morning lasts me all day without having to reapply and are not full of toxic waste!

I have dry skin all the time.  No matter what time of the year it is my skin is dry. I stopped using soap because it would dry my skin out too much.  I tried everything store bought but no matter how thick the lotion is I always have to reapply it a few times during the day if I want my skin to be soft.  I finally bought this stuff the other day at a "real food" store which was all natural and felt so good on my skin.  But it was $14.99 an ounce.  That's just a little too expensive for me.

So I thought how can I make this myself?  I know I can make it myself for a lot cheaper than $14.99 an ounce with no chemicals or other crap in it.

I tried using straight up coconut oil.  Yeah, no.  I felt greasy and couldn't put real clothes on or sit on any furniture for about 2 hours.  My skin felt smooth but I do not have two hours to dry off everyday.  I think it is better left for a once a week deep moisturizer after a nice long soak in a warm tub, not for everyday application.  Who am I kidding about being able to take a long soak in the tub, some days I am happy if I can go to the bathroom all by myself!

These lotion bars are made out of a few relatively inexpensive ingredients and is much thicker feeling than store bought lotion.  I have found that I only need to put it on once a day and my skin stays soft all day long.  They are also super easy to make.  Besides the drying time, it took me about 20 minutes from start to pour.

Homemade Lotion Bars

1/2 cup beeswax
1/2 cup shea butter or cocoa butter
1/2 cup coconut oil
Essential oil (Optional)
2 tsp of Vitamin E

Using a double boiler on medium heat, get the water to a boil, then melt the beeswax, then the coconut oil, then the shea butter.  Shea butter turns grainy when you over heat it so I add it last.  Take off the heat and add the essential oil and vitamin E. I used about 30 drops for this recipe but you can use as much or as little as you like.  Stir thoroughly.  I use the paper cupcake cups in a muffin tin because it is what I have on hand but you can use any type of mold you please.  Allow them to dry for at least an hour or more depending on the size of your mold.  Use the warmth of your hands to melt the bar a bit and rub on any dry spots!

Just poured into the molds
CAUTION!!  Do not keep these in the car or anyplace it gets really warm. Since they do not have chemical stabilizers, they will melt.


Finished!  

These lotion bars are good for everyone. The coconut oil is a natural antiseptic so you can use these bars on raw, dried or cracked skin without the painful stinging like the store bought lotions.  Coconut oil is also naturally an SPF4, so you are getting some sun protection.  Shea butter is good for healing dry skin, reducing wrinkles and scars, and is a natural anti inflammatory.  The beeswax locks in the moisture, softens skin and protects the skin from environmental factors.  Beeswax also has anti inflammatory and antibacterial properties making it safe to use on raw, cracked skin.

Ready to toss your old chemical laden-store bought lotion and start making your own?  Let me know what you think!

7/27/12

This Moment


{this moment} - A Friday ritual. A single photo - no words - capturing a moment from the week. A simple, special, extraordinary moment. A moment I want to pause, savor and remember.


If you're inspired to do the same, leave a link to your 'moment' in the comments for all to find and see. Via soulemama.


7/23/12

What's happening around here?

Sorry guys, summertime has us busier than bees some days.  We have been testing out some fun things, enjoying family and friends company, celebrating so there has been little time left during the day to blog.

We have.........Good news, Our chickens started laying just the other day.  We enjoyed a tasty omelette this past weekend.  We look forward each afternoon going out and getting the eggs.


We have.........Bad news (only for those chickens!).Our Freedom Rangers will go for processing in about 2-3 weeks.  I won't lie, I hate those evil demon spawn and will laugh all the way to the farm!  Muhahahahahaha!

Freedom Rangers
We tested............Coconut oil, tooth powder, dishwasher detergent and homemade yogurt to be exact.  I am not crazy about the dishwasher soap via here.  My dishes just are not getting clean so I still have a bunch of testing to do. I hope to have a post about the coconut oil, tooth powder and yogurt soon.  PS...I am a total fan of all three of these things but I am totally hooked on the tooth powder!  The Hubs on the other hand is kind of on the fence.


Image via
We planned..........Figuring out where our duck house and bees will go has been a little trying.  Only having three quarters of an acre with one third of that being wooded makes fitting gardens, swing sets, trampolines, chicken coops, duck houses, duck ponds, and dog houses a little trickier.  Nonetheless we will find the room so everyone is happy.

2 Buff's peeking out of the chicken coop
We researched..........We have been researching ducks, the Hubs has wanted ducks (and goats) for a while now.  Since we had bad luck with the chickens last year, I wanted to concentrate on the chickens.  Now we are semi sure we know what we are doing so we are getting ducks, no goats right now.  It looks like we will be getting some Runners, Rouens, and Pekings, next month.  They are all docile ducks so the kids can help and I don't have to worry about one of them getting pecked.

Image via
We gardened.........Getting our butterfly and bee garden established.  This garden is three years in the making and I have to say it is coming along well!!  Thanks to our friend Frank. He sells the greatest perennials, never uses pesticides on his perennials and I have never had any problem with any plant he has ever sold me.  I make one or two trips there a year and just love seeing everything he has to offer!  We were out until about 10 pm Sunday evening trying to get the last of the mulch down.  We ran out of landscapers fabric and called it an evening!  Hopefully I will be able to finish this today!

A butterfly on an echinacea flower

We celebrated......... Little Bug turned 5 this past weekend.  She is such a love!  What a sweet and beautiful little girl!


So this is what we have been doing for the past week, with a little rain mixed in!  How is summer treating you?

7/9/12

Freedom Rangers

We decided that this year we would get meat chickens.  And after talking to a local chicken farmer, we decided to go with Freedom Rangers, which were suppose to be somewhere in the middle of Cornish X and a heritage breed.  We got them on June 1st and figured they would only be with us a short period of time, what could go wrong......

I have never hated an animal in my life as much as I hate these chickens.  They stink to the high heavens, they poop EVERYWHERE, they eat ALL THE TIME, they are the ugliest birds ever, I do not think they actually groom themselves and at one point I thought they all had tumors growing out of their breasts. Turns out they grow that way. We have gone through three bags of feed in the past six weeks.  They forage but they prefer the feed over foraging.  I only supplement feed with the egg layers, but these guys think they are going to starve to death and will follow you around until you feed them.  They are vile and disgusting and I actually cannot wait to send them to the farm.  I will never get Freedom Rangers again.   I think next time around we will go with an actual heritage breed.  They may take a little longer to grow but that is okay.  Having raised other dual-purpose breeds I know what to expect.

Freedom Rangers

Our egg layers, of which our three Buff Orpingtons are dual-purpose, do not smell, they forage, and they look like normal chickens.  I love our girls, they are polite and let us pick them up and pet them, they love their little mealy worm treats and kitchen scraps.  I gave them some grass clippings from the lawn mower and they went crazy!!

Our egg layers

So I will continue our quest for a meat bird that is slow growing, docile and doesn't eat like a pig!  I will let you know what breed we try next!!

7/7/12

Christmas in July- Really?

Yes, I am crazy for making a Christmas post in July.  But why not?  I LOVE Christmas!  It is absolutely the best time of the year.  I always feel like all is good with the world from about Thanksgiving to New Years.  But I digress!

I spent last December DIY'ing most of our Christmas presents to our family and I felt so rushed.  But I was browsing through the internet and Pinterest the other day and started finding all kinds of Christmas stuff to make and give!

I am inspired to start planning in July.

I made a Ornament wreath this past year for my sister, maybe I should make her some garland to match?

via Pretty Quirky
Or some glitter ornaments for our tree.

via Cook~Love~Craft
Or I could make more paint ornaments, like last year.

Handmade by me
And maybe I will let the girls get crafty with me again this summer and we can make these!

Little Bird's hand print snow family!

I have a new found love to make things and I am kind of good at it!  Toot! Toot!  And now that my family room is complete I have another Christmas tree to set up and decorate!  Yay!

When do you start feeling inspired for Christmas?  What do you do to keep yourself from becoming overwhelmed?


7/6/12

This Moment


{this moment} - A Friday ritual. A single photo - no words - capturing a moment from the week. A simple, special, extraordinary moment. A moment I want to pause, savor and remember.


If you're inspired to do the same, leave a link to your 'moment' in the comments for all to find and see. Via soulemama.


6/29/12

This Moment


{this moment} - A Friday ritual. A single photo - no words - capturing a moment from the week. A simple, special, extraordinary moment. A moment I want to pause, savor and remember.


If you're inspired to do the same, leave a link to your 'moment' in the comments for all to find and see. Via soulemama.


6/26/12

Being green

Welcome to the June 2012 Simplicity Parenting Carnival: Green Living
This post was written as part of the monthly Simplicity Parenting Carnival hosted by The Lone Home Ranger and S.A.H.M. i AM. This month we are discussing how we find ways to be more natural parents and stewards of the environment. Be sure to read to the end to see a list of the rest of the excellent carnival contributors.
***
I have to admit I got really excited when I read that green living was the topic for this month's Simplicity Parenting Blog Carnival!  Becoming green can be one of the easiest, healthiest and cheapest changes you can make in your life! 

I used to think that my house had to smell a certain way in order for it to be "clean" and it wasn't disinfected unless bleach was used on every surface. I also used to think that being green was unattainable and so hard I couldn't possibly do it.  I was certainly wrong!

Those "smells" in my home that I loved so much, were actually toxic VOC's (Volatile Organic Compounds) which have both short and long term effects and they cause things like irritations of the eyes and nasal passages. It made me to think about my kids growing up with all kinds of health problems that could have been avoided had I just not used the bald guy or bubbles that scrubbed. 

Where do I begin with bleach?  The companies who sell these products will make you think nothing else could kill those nasty germs!  But did you know bleach isn't the safest method for getting rid of germs?  Bleach can also cause respiratory problems such as asthma and allergies, cause skin burns, be absorbed into your skin, and cause damage to your vital organs and central nervous system.  There are many essential oils that do the same job as bleach but without the harmful side effects!

Being green really couldn't be easier. 

Okay, so how did we do it?  Baby steps. We changed our habits one thing at a time.  

First we started with a garden and determined that we were going organic.  That meant no pesticides anywhere in our yard.  I thought this was going to be hard because we have carpenter ants.  But...

We got chickens; they are like a natural pesticide.  They were the one, two punch we needed to get rid of the bugs without having to use harmful chemicals.  I watch them pick bugs out of mid air!  They are adorable too!  

Happily eating bugs!


Then we changed the household cleaners from the harsh chemically stuff over to Mrs. Meyers.  Then I found out I could make the same Mrs. Meyer's cleaners myself.  Cheaper.  I like cheaper, it saves the money we work so hard for!  

Here is a list of the household cleaners we have changed so far:

Laundry Soap- Recipe below
Fabric Softener- Recipe below
All-purpose cleaner
Powdered tub cleaner
Wood Floor cleaner
Flea powder (for carpets only)

We also decided that we were going paperless for our everyday life.  I took exception to things like parties because I am just not that into doing the dishes!  Pretty much we just stopped buying paper plates, napkins and paper towels.  Microfiber towels are our best friends now!  I do keep a few rolls paper towels in the house for when the dogs or cats mess in the house or to clean up something REALLY yucky, but that is all we use them for.

How can you start your baby steps?  Here are three tips to get you started:

1. Decide what you want to change.  Maybe you just want to start out by making your own all-purpose cleaner. 

2. Research and test.  Find some recipes for homemade cleaning products.  I like TipNut.com a lot and use it as a starting point for a lot of different things!  

3. Start small.  You do not want to make a huge batch of that all-purpose cleaner only to find out you hate it or it does not work as well as you thought.

I hope I have inspired you to start becoming greener!


HOMEMADE LAUNDRY SOAP- Recipe from TipNut.com 


Hot water
1 cup Washing Soda
1/2 cup Borax
1 Soap bar- I use scented castile soap or Fels Naptha, 
Grate the bar and add to a large saucepan with hot water. Stir over medium-low heat until it dissolves and is melted. Do not let the water boil!  Fill a 10 gallon pail half full of hot water. Add the melted mixture, Borax and Washing soda; stir well until all powder is dissolved. Top the pail up with more hot water. Use 1 cup per load, stirring soap before each use.

HOMEMADE FABRIC SOFTENER- I almost feel like this is cheating but it is just too good not to share!!
Vinegar
I use a fabric softener ball to measure the amount but I would say it is about a quarter cup of vinegar for a large load of laundry.


How easy is this?  


***

Thanks for reading the Simplicity Parenting Blog Carnival! We hope you’ll take time to read these other great contributors’ posts: SimParCarButton150x150

  • Almost Crunchy - Molly at Molly Makes Do writes about her life as "Almost Crunchy" and the baby steps she's taken to get from "Not at All" to "Almost."
  • A (Mostly) Plastic Free Life - Kellie at Our Mindful Life reflects on the recent intrusion of plastic into her usual plastic free home.
  • Slowly Greening Our Home - Dana at Urban Hippie Momma has slowly reduced the amount of paper waste in her home with a few simple practices.
  • Being Green - Anne at Raising Sweet Grace shares her tips on being a green parent.
  • Back to Basics - Justine at The Lone Home Ranger channels her greatgrandmother’s cleaning tips to make her household healthier, more frugal, and more earth-friendly.
  • It's Not (Always) Easy Being Green - Emily at S.A.H.M. i AM discusses the little things her family does to be more eco-friendly but admits it's not always as easy as it sounds.
Thanks to all the fabulous writers and readers for being a part of our simplicity parenting community! Stop by The Lone Home Ranger and S.A.H.M. i AM to see how to join us for a future carnival.