Background

8/31/12

NOFA-NY Locavore Challenge- Join me!

I am not doing my regularly scheduled "This Moment" post today.  Mainly because I was too lazy to put this post up on Wednesday like originally planned but I just spent a few days researching/buying a new TV because Bug decided to wash the old (and perfectly working) TV.  She threw a freaking whole cup of water at time.  The joys of parenting!

Sure she's cute but watch out she'll destroy electronics!
I love eating real food.  It makes me feel good, helps me keep some of the more serious complications of the PCOS at bay and it is just plain delicious!  I really cannot eat processed foods anymore without either tasting all the crap in it or getting sick. It has taken me a while to do this. On vacation I had one of those fake cheese and cracker packs and I took one bite and that was it, yuck!

We have been slacking in the meal planning department a bit in our house this summer.  I was looking through our bank statements and I saw just exactly how much we were eating out for dinner, which was way more than we were eating at home.  Uh-oh!  Don't judge, life happens!

Then I realized September is right around the corner.  This means that the NOFA-NY Locavore challenge will be here.  What a great way to get back into eating healthy again!


If you do not know what the NOFA-NY Locavore Challenge is let me enlighten you!  The Locavore Challenge is simply 30 days of eating local, organic and sustainably grown food.  You can challenge yourself to a day, week or the entire month.  They also host events throughout New York State, ending with a statewide potluck on September 30th.


We are planning on doing the entire month.  So I thought what a perfect time to also challenge ourselves to a month of no take out!  The Hubs even said he would try to go a whole month without soda!  I was floored! 

So for the month of September I will share with you visits to farms, tips on how to take baby steps to get rid of the processed foods and replace them with real foods, real food recipes, and our trials and errors!  It is going to be a great time!  I cannot wait to share with you our trip to the beef farm!    

So I hope you will join me?  Do you think you can eat real food for a day, a week, or a whole month!  And you don't have to live in New York to challenge yourself, I won't tell.  I would love to turn this into a little virtual challenge/party and share some real food recipes!  Maybe have a little picture potluck on the 30th?  Sound fun?  

If you are interested in joining me leave a comment below or drop me a line at raisingsweetgraceATgmailDOTcom and let me know!  

8/24/12

This Moment


{this moment} - A Friday ritual. A single photo - no words - capturing a moment. A simple, special, extraordinary moment. A moment I want to pause, savor and remember.


If you're inspired to do the same, leave a link to your 'moment' in the comments for all to find and see. Via soulemama.


8/22/12

Ahhh vacation!

Who doesn't love vacation?  I could spend my life on the beach.  There was nothing like the smell of the ocean and listening to the waves crash on the shore.  We even got to see some dolphins swimming around.  I took pictures of everything!!

The kids spent a whole week in Wildwood, NJ, the Hubs and I came down and joined them later that same week.  It was nice that the Hubs and I got a little alone time.  We tend to put ourselves last for just about everything and it was nice to just focus on one another.

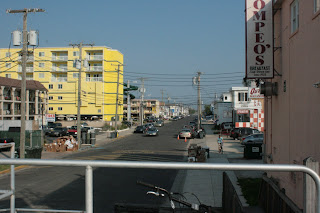
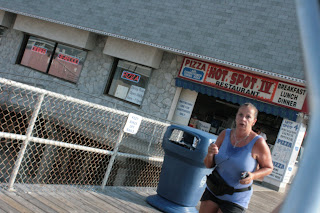
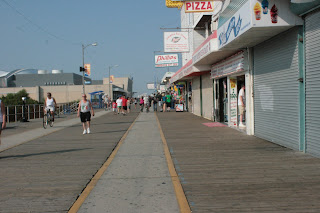
Anywhoo!!  We went on a bike ride on Friday morning and I gave Little Bird the camera.  She took some awesome pictures of the boardwalk.  Bug had my cousins camera so she was happy.  I love Bird's perspective, take a look!!


Pretty good for a six year old, right?

8/10/12

This Moment


{this moment} - A Friday ritual. A single photo - no words - capturing a moment. A simple, special, extraordinary moment. A moment I want to pause, savor and remember.


If you're inspired to do the same, leave a link to your 'moment' in the comments for all to find and see. Via soulemama.


8/9/12

Sunbathing and Homemade Sunscreen

I am going to start this post with a disclaimer: Please use common sense when taking my advice, not that I would intentionally put you in harms way.  That being said, I am not a doctor, I just do what I think is best for my family.   

Now that I got that out of the way!

There is so much controversy about the amount of time we should spend in the sun, should we use sun block, should we not.  But did you know that you can get your daily dose of Vitamin D from 15 minutes of unprotected sun exposure and it can decrease your risk for certain cancers including breast cancer and colon cancer?

Somewhere in Florida
Personally, we do not use sunblock unless we are going to be out in direct sun all day long or during peak sun hours (even then I am reluctant to use it).  In my opinion sunbathing, in conjunction with a healthy diet, is extremely good for you.  I also think the risks of the sun out weigh the risks of sun block.  Commercial sunblocks contain tons of chemicals and research shows sunblocks are often the cause of cancer.  It is scary to think that we are constantly being told to slather this stuff all over ourselves for the sake of preventing cancer.

Little Bird at the beach a few years ago

With organic and natural products being so expensive (I have seen some sunscreen that were upwards of $20, ouch!)  I started researching how to make homemade lotions, soaps, tooth paste, etc.  I know exactly what is in them and I feel comfortable with my family using them.  I am absolutely in love my homemade lotion.  I gave some to my neighbor and babysitter this past time and they loved it too!!  So I thought why not sunscreen?  You can use this on your face, just avoid the eye area.  Since it contains absolutely no chemicals, it is safe to use on the whole family.

HOMEMADE SUNSCREEN-About an SPF 30

1/2 cup beeswax
1/2 cup coconut oil
2 tsp of Shea Butter
1 cup almond oil
2 tsp Vitamin E oil
4 Tbsp powder Zinc Oxide (Be sure not to inhale)
Essential oil (EO)- (Do not use citrus oils as they can cause an unpleasant reaction when exposed to the sun causing it to lose it's effectiveness)

Start by putting water in a double boiler, if you do not have a double boiler use a glass bowl in a pot or I have seen people use mason jars.  I prefer the glass bowl, it's easier to clean.  (Side note: do not use any bowls or utensils that you plan on eating out of at a later time.)  Add everything except the zinc and EO and melt.  I like to add the bees wax first, then the coconut oil, then the shea butter, vitamin e and almond oil.  Once melted take off the heat and mix in the zinc and EO.  Pour into a small mason jar or muffin paper and enjoy!  It is a thick lotion and cannot be put into bottles but it will melt if the temperature goes over 75 degrees so store it in a cool dry place like the fridge!  If you want a higher SPF just add more zinc.  THIS IS NOT WATERPROOF, YOU WILL HAVE TO REAPPLY IF YOU SPEND TIME IN THE WATER!

The sunscreen will be good for about 6 months.

Sorry for the dark picture, there is not a lot of light in my kitchen at 10:30 at night!


Are you inspired to start making non toxic versions of your favorite products?  It is incredibly easy to do!  Let me know what products you have started making below!

8/3/12

This Moment


{this moment} - A Friday ritual. A single photo - no words - capturing a moment from the week. A simple, special, extraordinary moment. A moment I want to pause, savor and remember.


If you're inspired to do the same, leave a link to your 'moment' in the comments for all to find and see. Via soulemama.


8/1/12

Homemade Lotion Bars

We have been testing and testing different homemade beauty products.  I just love these homemade lotion bars.  One application in the morning lasts me all day without having to reapply and are not full of toxic waste!

I have dry skin all the time.  No matter what time of the year it is my skin is dry. I stopped using soap because it would dry my skin out too much.  I tried everything store bought but no matter how thick the lotion is I always have to reapply it a few times during the day if I want my skin to be soft.  I finally bought this stuff the other day at a "real food" store which was all natural and felt so good on my skin.  But it was $14.99 an ounce.  That's just a little too expensive for me.

So I thought how can I make this myself?  I know I can make it myself for a lot cheaper than $14.99 an ounce with no chemicals or other crap in it.

I tried using straight up coconut oil.  Yeah, no.  I felt greasy and couldn't put real clothes on or sit on any furniture for about 2 hours.  My skin felt smooth but I do not have two hours to dry off everyday.  I think it is better left for a once a week deep moisturizer after a nice long soak in a warm tub, not for everyday application.  Who am I kidding about being able to take a long soak in the tub, some days I am happy if I can go to the bathroom all by myself!

These lotion bars are made out of a few relatively inexpensive ingredients and is much thicker feeling than store bought lotion.  I have found that I only need to put it on once a day and my skin stays soft all day long.  They are also super easy to make.  Besides the drying time, it took me about 20 minutes from start to pour.

Homemade Lotion Bars

1/2 cup beeswax
1/2 cup shea butter or cocoa butter
1/2 cup coconut oil
Essential oil (Optional)
2 tsp of Vitamin E

Using a double boiler on medium heat, get the water to a boil, then melt the beeswax, then the coconut oil, then the shea butter.  Shea butter turns grainy when you over heat it so I add it last.  Take off the heat and add the essential oil and vitamin E. I used about 30 drops for this recipe but you can use as much or as little as you like.  Stir thoroughly.  I use the paper cupcake cups in a muffin tin because it is what I have on hand but you can use any type of mold you please.  Allow them to dry for at least an hour or more depending on the size of your mold.  Use the warmth of your hands to melt the bar a bit and rub on any dry spots!

Just poured into the molds
CAUTION!!  Do not keep these in the car or anyplace it gets really warm. Since they do not have chemical stabilizers, they will melt.


Finished!  

These lotion bars are good for everyone. The coconut oil is a natural antiseptic so you can use these bars on raw, dried or cracked skin without the painful stinging like the store bought lotions.  Coconut oil is also naturally an SPF4, so you are getting some sun protection.  Shea butter is good for healing dry skin, reducing wrinkles and scars, and is a natural anti inflammatory.  The beeswax locks in the moisture, softens skin and protects the skin from environmental factors.  Beeswax also has anti inflammatory and antibacterial properties making it safe to use on raw, cracked skin.

Ready to toss your old chemical laden-store bought lotion and start making your own?  Let me know what you think!